
Mountain Adventure Travel Guide for Beginners
n n
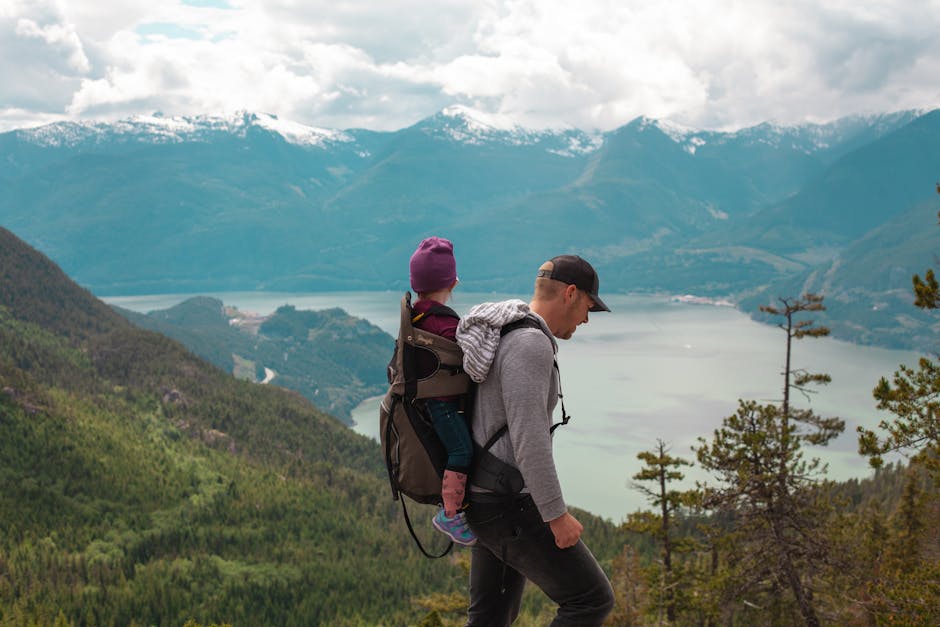
If you’re new to mountain travel and looking for a practical starting point, this mountain adventure travel guide for beginners covers the essentials to help you plan, prepare, and stay safe. Whether you’re dreaming of hiking alpine trails, camping under star-filled skies, or simply experiencing the quiet majesty of high-altitude landscapes, getting started doesn’t have to be overwhelming. With the right knowledge, gear, and mindset, your first mountain adventure can be both rewarding and safe. This guide walks you through destination selection, essential gear, physical preparation, weather awareness, and safety protocols—all tailored for those taking their first steps into mountain environments.
nn
Why Choose Mountain Adventure Travel?
n n
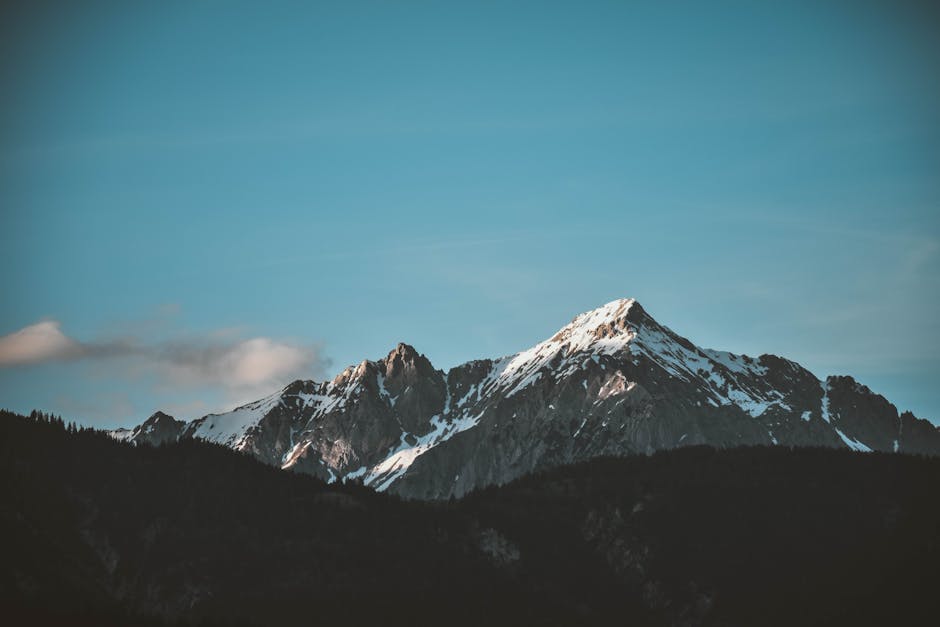
Mountain travel offers a unique blend of physical challenge, natural beauty, and mental clarity. Unlike beach vacations or city breaks, mountain adventures immerse you in raw, untamed environments where every step brings a new perspective. The air is crisper, the views are grander, and the sense of accomplishment after reaching a summit or completing a trail is deeply personal.
n n
For beginners, mountains provide accessible entry points—many national parks and trail systems are designed with novice hikers in mind. Trails are often well-marked, elevations manageable, and facilities like restrooms, shelters, and ranger stations available at trailheads. Plus, mountain regions frequently host visitor centers with maps, safety tips, and guided programs ideal for first-timers.

n n
Beyond recreation, mountain travel encourages mindfulness. The rhythm of walking, the sound of wind through pines, and the absence of urban noise create space for reflection. Many travelers report improved mood, reduced stress, and a renewed sense of connection to nature after even short mountain trips.
nn
Choosing Your First Mountain Destination
n n
Selecting the right location is the most important decision for a beginner. You want a place that matches your fitness level, offers clear trails, and has reliable access to help if needed. Consider these factors when choosing:
n n
- n
- Elevation gain: Start with trails under 1,000 feet of elevation gain. Steep climbs can be exhausting and increase the risk of altitude sickness.
- Trail length: Begin with hikes under 5 miles round-trip. This allows time to enjoy the scenery without overexertion.
- Trail conditions: Look for well-maintained paths with minimal scrambling or exposure. Avoid technical routes requiring climbing gear.
- Weather patterns: Research seasonal conditions. Summer offers the most stable weather, while spring and fall may bring snow or rain at higher elevations.
- Accessibility: Choose destinations within a few hours’ drive to minimize travel fatigue.
n
n
n
n
n
n n
Great beginner-friendly mountain regions include:
n n
- n
- Rocky Mountain National Park, Colorado: Offers flat lakeside walks and gradual inclines like Bear Lake and Sprague Lake trails.
- Shenandoah National Park, Virginia: Features the Skyline Drive with numerous pull-offs and easy-to-moderate hikes such as Dark Hollow Falls.
- Mount Rainier National Park, Washington: The Skyline Trail provides stunning views with manageable elevation changes.
- Great Smoky Mountains, Tennessee/North Carolina: Abundant waterfalls, lush forests, and trails like Laurel Falls cater to all skill levels.
n
n
n
n
nn
Essential Gear for Mountain Adventure Travel
n n
Proper gear makes the difference between a comfortable hike and a miserable one. You don’t need expensive or high-tech equipment to start, but investing in a few key items ensures safety and enjoyment.
n n
Footwear
n
Sturdy hiking boots or trail shoes with ankle support and grip are non-negotiable. Avoid sneakers—they lack traction and protection on uneven terrain. Break in new footwear before your trip to prevent blisters.
n n
Clothing
n
Dress in layers using the “onion method”: a moisture-wicking base layer, insulating mid-layer (like fleece), and a waterproof outer shell. Cotton should be avoided—it retains moisture and can lead to hypothermia in cold conditions.
n n
Backpack
n
A 20–30 liter daypack is sufficient for most day hikes. Look for padded straps, a waist belt, and multiple compartments. Hydration compatibility (for a water bladder) is a plus.
n n
Navigation Tools
n
Carry a physical map and compass, even if you use a GPS app. Batteries die, signals drop, and trails can be poorly marked. Learn basic map reading before you go.
n n
Safety and Survival Items
n
Pack the “10 Essentials”:
n
- n
- Navigation (map & compass)
- Headlamp or flashlight (with extra batteries)
- Solar blanket or emergency shelter
- First-aid kit
- Fire starter (matches, lighter, or fire steel)
- Repair kit and multi-tool
- Extra food (at least one extra meal)
- Extra water (and a way to purify more)
- Sun protection (sunglasses, sunscreen, hat)
- Insulation (extra clothing)
n
n
n
n
n
n
n
n
n
n
n n
Many beginners overlook the importance of sun protection at altitude—UV exposure increases significantly above 5,000 feet.
nn
Physical Preparation and Training
n n
Mountain terrain demands more from your body than flat ground. Even moderate hikes can be strenuous due to elevation, uneven footing, and weather changes. Preparing physically reduces injury risk and increases enjoyment.
n n
Start training at least 4–6 weeks before your trip. Focus on:
n n
- n
- Cardio: Brisk walking, jogging, or cycling 3–4 times per week builds endurance.
- Strength training: Squats, lunges, and step-ups strengthen legs for uphill climbs and downhill control.
- Balance and stability: Practice walking on uneven surfaces like gravel or trails. Use trekking poles during training to get used to the motion.
- Altitude simulation: If possible, train at higher elevations. Otherwise, incorporate stair climbing or hill repeats into your routine.
n
n
n
n
n n
Aim to complete a few practice hikes with your full pack before your main trip. This helps identify gear issues and builds confidence.
nn
Understanding Mountain Weather and Conditions
n n
Weather in mountains is unpredictable and can change rapidly. A sunny morning can turn into a thunderstorm by afternoon. Being prepared means checking forecasts and understanding local patterns.
n n
Key weather considerations:
n n
- n
- Temperature drops with elevation: Expect a 3.5°F decrease for every 1,000 feet gained. A 70°F day at base camp could mean 50°F at 6,000 feet.
- Wind increases at higher elevations: Ridges and peaks are exposed and can be dangerously windy, even on calm days below.
- Lightning risk: Mountains are prone to afternoon thunderstorms. Avoid exposed ridges, summits, and tall trees during storms. Descend to lower elevations if thunder is heard.
- Snow and ice: Even in summer, high-altitude trails may have snow patches. Microspikes or traction devices can help on icy sections.
n
n
n
n
n n
Always check the National Weather Service or park-specific forecasts before heading out. Many mountain areas have dedicated avalanche or storm warning systems.
nn
Safety Tips for First-Time Mountain Travelers
n n
Safety should be your top priority. Mountains are beautiful but unforgiving. A small mistake can lead to serious consequences. Follow these guidelines:
n n
- n
- Tell someone your plan: Share your itinerary, expected return time, and emergency contacts with a trusted person.
- Hike with a partner: Never go alone. If an injury occurs, having someone to help or call for aid is critical.
- Know your limits: Turn back if you feel unwell, tired, or unsure. Summiting isn’t worth risking your safety.
- Stay on marked trails: Off-trail travel increases the risk of getting lost or damaging fragile ecosystems.
- Be bear and wildlife aware: Store food in bear-proof containers or hang it properly. Make noise while hiking to avoid surprising animals.
- Carry a whistle: Three sharp blasts are the universal distress signal. It carries farther than your voice.
n
n
n
n
n
n
n n
If you do get lost, stop, stay calm, and use your map and compass to reorient. If you can’t find your way, stay put—rescuers are more likely to find you if you don’t wander.
nn
Leave No Trace: Protecting Mountain Environments
n n
Mountain ecosystems are fragile and often slow to recover from human impact. As a visitor, you have a responsibility to minimize your footprint.
n n
Follow the seven Leave No Trace principles:
n n
- n
- Plan ahead and prepare: Know the regulations and terrain.
- Travel and camp on durable surfaces: Stick to trails and established campsites.
- Dispose of waste properly: Pack out all trash, including food scraps and toilet paper.
- Leave what you find: Don’t pick plants, disturb rocks, or take souvenirs.
- Minimize campfire impacts: Use a camp stove instead of building fires.
- Respect wildlife: Observe from a distance. Never feed animals.
- Be considerate of other visitors: Keep noise down and yield on trails.
n
n
n
n
n
n
n
n n
Simple actions—like packing out a candy wrapper or staying on the trail—help preserve these spaces for future adventurers.
nn
What to Expect on Your First Mountain Adventure
n n
Your first trip may feel overwhelming, but knowing what to expect helps ease anxiety. Here’s a typical day-hike timeline:
n n
- n
- 6:00 AM: Wake up, eat a high-energy breakfast (oatmeal, nuts, fruit), and pack your bag.
- 7:00 AM: Arrive at trailhead. Check weather, sign in at register (if required), and review your route.
- 7:30 AM: Begin hike. Start slow to warm up. Take breaks every 30–45 minutes.
- 10:00 AM: Reach a scenic viewpoint. Hydrate, snack, and enjoy the view.
- 11:30 AM: Begin descent. Downhills can be harder on knees—use trekking poles and take small steps.
- 1:00 PM: Return to trailhead. Change into dry clothes, rehydrate, and refuel with a meal.
n
n
n
n
n
n
n n
You may feel tired, sore, or emotional—especially if you reached a summit. These are normal reactions to physical exertion and altitude. Rest, eat well, and reflect on the experience.
nn
Common Mistakes Beginners Make (And How to Avoid Them)
n n
Even with the best intentions, new mountain travelers often fall into predictable traps. Learn from these common errors:
n n
- n
- Overestimating ability: Choosing a trail beyond your fitness level leads to exhaustion or injury. Start small and build up.
- Underestimating weather: Assuming “it’s just a short hike” leads to being unprepared for storms or cold. Always carry rain gear and layers.
- Ignoring hydration: Dehydration worsens altitude effects. Drink water regularly, even if you don’t feel thirsty.
- Poor footwear: Blisters from ill-fitting shoes can ruin a trip. Test boots before you go.
- Skipping the map: Relying solely on phone GPS is risky. Batteries die, and signals vanish in canyons.
n
n
n
n
n
n n
Remember: It’s better to turn back early than to push through and risk an emergency.
nn
How to Build Confidence for Future Trips
n n
After your first adventure, reflect on what went well and what could improve. Keep a journal of your experiences, gear performance, and physical reactions. This helps you plan better next time.
n n
Gradually increase difficulty by:
n n
- n
- Adding elevation gain (aim for 1,500–2,000 feet on your second trip)
- Extending distance (try 6–8 mile hikes)
- Exploring different terrains (rocky trails, river crossings)
- Trying overnight backpacking (start with a one-night trip)
n
n
n
n
n n
Join a local hiking group or outdoor club. Learning from experienced travelers accelerates your skills and builds confidence.
nn
Mountain Adventure Travel Gear Comparison
n n
Choosing the right gear can be confusing. Below is a comparison of common beginner-friendly options to help you decide.
nn
| Gear Item | Budget Option | Mid-Range Option | Why It Matters |
|---|---|---|---|
| Hiking Boots | Merrell Moab 2 Ventilator ($100) | Salomon X Ultra 3 GTX ($150) | Ankle support and grip prevent slips and injuries on uneven trails. |
| Backpack | Teton Sports Explorer 40 ($60) | Osprey Talon 22 ($130) | Proper fit and ventilation reduce shoulder and back strain. |
| Rain Jacket | Columbia Watertight II ($70) | Arc’teryx Beta LT ($400) | Waterproof protection keeps you dry and warm in sudden storms. |
| Trekking Poles | Cascade Mountain Tech Carbon ($40) | Black Diamond Alpine Carbon Cork ($150) | Reduce knee impact on descents and improve balance on rough terrain. |
nn

